
I suggest that you watch the Easy Care videos several times…. http://www.easycareinc.com/education/videos.aspx
I glue on Renegades the same way I glue on Gloves except that I use a strip on duct tape around the heels and boot to keep it secure while the Adhere cures.
I have also used Gorilla Tape on the front of Easy Care Wide shells immediately after gluing them on to hold the flaps down; the toe in the wides doesn’t fit tightly across the dorsal wall on many horses… this probably doesn’t change the fit but it makes me feel happy. Alternately I’ll use a Power Strap. I have also used Gorilla Tape on the fronts of wide Glove strap on boots to, to help keep silt out.
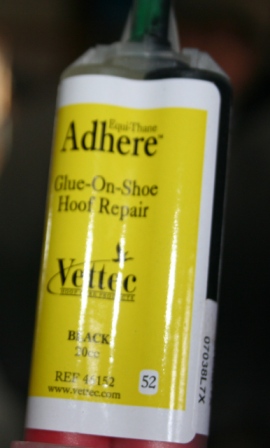
My technique is based on Easy Care and Renegades information, on what they did in the past, or on what I learned from Larkin Greene, the Western Region Manager for Vettec. Vettec makes the Adhere Adhesive most frequently used for gluing on boots. Larkin’s a great resource for professionals and can be contacted at lgreene@vettec.com. None of this is new, I did it so people can print it out to have a guideline to follow.
In summary:
- clean the feet thoroughly with a sanding block or the fine side of a rasp
- use denatured alcohol if you need to clean the wall, sole and inside of the shell with a gauze pad or piece of towel. Its best to never touch the inside of the shell – at all – prior to gluing it on.
- use a air gun or small torch to thoroughly dry the hoof
- if you want to use Silkaflex / Goober Glue on the sole or back of the boot, you can do all the boots at once immediately before starting with Adhere; it cures slow so will stay soft
- clear the tube of adhere (get both chambers flowing)
- add the mixing tip and discard a small amount to clear the gun
- add adhere to the edge of the wall
- fit the boot securely and align
- lower the hoof and pick up the opposite hoof and keep it up approximately 5 minutes
- fill the seam where the boot meets the hoof with Adhere as the hoof is being held up and create a 1/2″ “ramp” to blend the edge of the boot to the wall.

I wear latex gloves as much to keep my body oils from getting inside the boot or on the wall as to keep my hands clean. If I have to put the prepped foot down, I place it on a clean paper towel.
If I’m booting for a one-day performance ride, I add glue to the boot 1 inch below the rim. If you use much more glue you have a very hard time removing the boot!
REHAB GLUING
If I’m gluing a boot on for rehab and want it to stay on multiple days, I use a 2″ hole drill to cut a hole in the bottom of the shell and dril several 1/8″ holes in the shell to allow glue to seep out. The glue in these holes adds strength to the bond if the horse twists its foot. I also add more glue, going down 1/4 inch above the bottom of the shell. You do not typically want to get Adhere on the base of the boot under the center of the sole because it cures hard and can bruise the sole of a tender footed or flat soled horse.
If the shell is a tight fit, I have a mallet ready to tap it in place, but I prefer to heat fit the shell so that it slides on without a mallet. Again, once I put the booted foot down I have someone pick the opposite foot up for about 5 minutes. I keep the horse quiet for an hour afterwards to allow the boot to cure.
Dental Impression Material, Sole Pack or Silkaflex???
What used to be called “Goober Glue” is now called Silkaflex windshield adhesive… it’s reportedly VERY toxic so check out this page and use your own judgement… I may start using Dental Impression Material (available online or at farrier supply stores) or other commercially available sole packs. http://www.hex.co.uk/MSDS/Sika/227%20-%20Sikaflex.pdf
EasyCare’s video (July 2012) showed putting the Silkaflex in before putting the boot on, but if the horse is a squirmier, I start out by drilling two 3/16″ holes in the base of the boot at the deepest part of the collateral grooves(between the “heels” and “frog”) and cover the holes with small pieces of duct tape placed on the outside of the boot. Once the boot is securely Adhered on, I remove the tape and pump Silkaflex in one of the holes until it comes out the other, put the hoof down on something cushy (a towel) and pick up the opposite foot to eject any excess Silkaflex and relieve pressure in the boot.
If I’m using Silkaflex, I put a wide worm of it across the back of the boot where the boot hits the heel bulbs and heels, before I put Adhere in the boot. This provides a soft gasket that keeps dirt out of the boot.
I use Silkaflex in the sole o only when I’m riding on very concussive footing, if the boots will be subject to a lot of torque or if I’ll be riding in deep silt and sand. I don’t use it for events such as dressage or if the trail is “good”…
WHAT TO DO IF GLUING GOES WRONG????
I suggest having a spare boot in each size, as well as spare Adhere and mixing tips, just in case something goes wrong.
I glued boots on Gabby recently and we ended up doing it in the back of the trailer because we were in sandy desert.
When he put his foot down, the boot shifted slightly, I couldn’t get the foot up in the confines of the trailer, so I chose to let it go
If you twist the boot after the Adhere starts to set up,, the Adhere bond may not hold. If I’d had an extra shell, I would have whipped that shell off before it was set up and put the other shell on. I didn’t want to chance taking the boot off and being able to get the adhere out because, again, it was my last boot!
That boot did come off! Good lesson.